
As a business professional, you’ve probably dabbled in the art of PowerPoint. And if you host webinars regularly, I’m sure you’ve picked up a few tricks to spice up your presentations and make them more engaging too.
Whether you’re a PowerPoint newbie or an emerging pro, here are 10 cool PowerPoint tips and tricks you’ll want handy for your next presentation.
POWERPOINT BASICS EVERYONE SHOULD KNOW
1. Don’t settle for the basic, built-in PowerPoint templates
PowerPoint templates make your lives easier. Templates mean you don’t have to design everything from scratch. Just select your layout, add your content, make a few edits here and there, and you’re done. So why not use the basic templates in PowerPoint? In case you’ve forgotten what they look like, here’s a refresher:
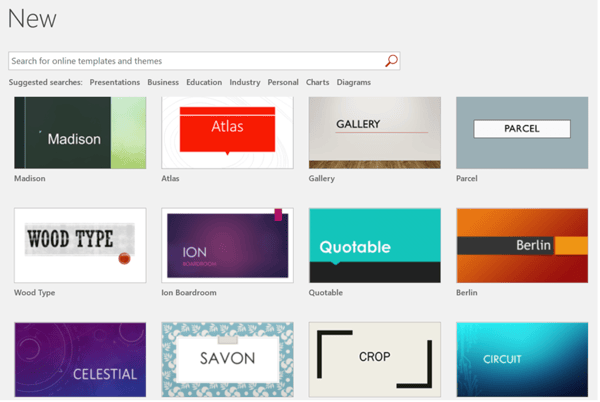
Millions of people have used these templates in their presentations. If you don’t want your presentation to look like a copy-paste, stay away from the built-in templates.
The good news is there are other free and premium templates out there beyond the ones Microsoft provides. In fact, at 24Slides.com, you can download premium templates for free. These PowerPoint designers understand the psychology behind effective presentations, and you can borrow from the best.
2. Use Format Painter to save time
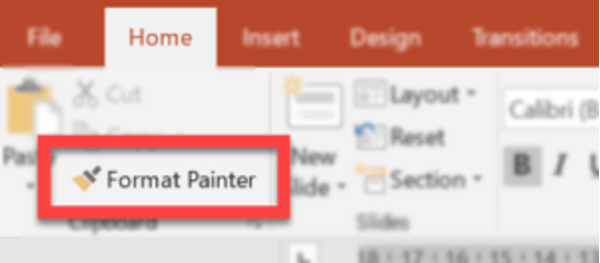
Format Painter does one thing and one thing only: it saves you time. Tons of it, in fact. Here’s where you find this nifty time-saver on your PowerPoint ribbon:
If you’ve ever tried copy and pasting one element’s format to many other elements on the same slide, or on 100 other slides, you know how time-consuming the process is.
Without Format Painter, formatting elements goes something like this:
- Format one element and remember all the different settings.
- Format the second element and then try to remember all the settings from the first element.
- Look at the clock and realize you’ve wasted 10 minutes.
With Format Painter, however, all you do is:
- Click the first element.
- Hit Format Painter.
- Click the second element.
That’s it! If you want to copy the first element’s format and paste into more than one element, just double-click Format Painter and click each element you want to format one by one. When you’ve formatted all the elements, hit ESC on your keyboard. It’s that easy.
POWERPOINT ANIMATION TRICKS
3. Animate a flowchart to make it come alive
Flowcharts are a great way to display complex information. However, you may not want to show an entire flowchart at once. Instead, you want each point to appear at the right time so you can discuss each point verbally.
Here’s how you animate a flow chart in PowerPoint:
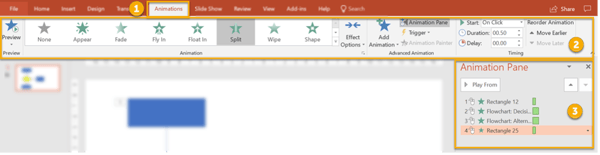
- Click the first element, point, or process in your flowchart. Then select an animation from the Animations tab.
- Define each element’s animation and timing settings.
- You can also open the Animations Pane to view and adjust your animation settings.
- Repeat steps 1 and 2 for all elements in your flowchart. Make sure you preview the whole flowchart animation and edit as necessary.
4. The Zoom feature for Office 365 subscribers
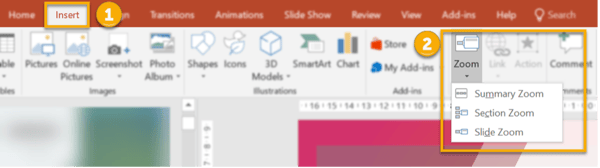
If you have an active Office 365 subscription, you can use the Zoom feature on the insert tab. As you can see in the screenshot below, there are three Zoom options:
- Summary Zoom
- Section Zoom
- Slide Zoom
The Zoom feature is great when you want to jump from one section or slide to another. Let’s say you want to go from Slide 10 to Slide 55. In a regular PowerPoint presentation, you’d have to go through slides 11 to 54. But with Zoom, you can instantly go from slide 10 to 55 before your audience has a chance to lose interest. Of course, you’d have to plan ahead and know which slide you want to skip to.
The Summary Zoom feature creates a summary slide which is similar to a ‘table of contents’ for your slides. You can insert this summary slide anywhere you want, it doesn’t have to be the first slide in your presentation.
The Section Zoom feature allows you to jump from one section to another, while the Slide Zoom feature allows you to jump to any slide in your presentation.
EVEN MORE POWERPOINT TRICKS FOR ADVANCED USERS
5. Use a video background for your slides
We’ve all used background images on PowerPoint, but did you know you can also use a video as a background?
Simply drag and drop your video on to your slide and resize it to cover the entire slide. If you’re short on video, go to Coverr.co for free stock videos.
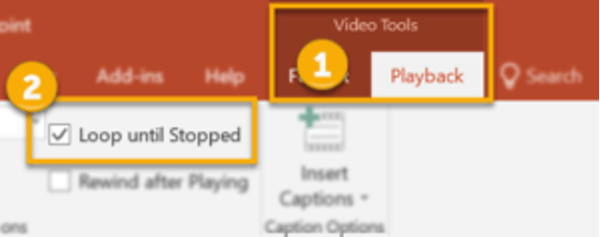
If your video is only a few seconds long, and won’t last the length of your slide’s discussion, just loop it. To loop your video:
- Click the video to access the Video Tools menu, then click the Playback tab.
- Check Loop Until Stopped.
With your video background in place, you can add shapes, texts, or any other elements you want to use as your slide’s foreground.
6. Make global changes to your presentation
Editing your slides one by one is super time-consuming. If you want to change your entire presentation’s look, go to the Design tab and choose from the available themes in the Themes section.

However, if you want more control over the colors and fonts, go to the Variants section (still in the Design tab). Click the drop-down to display color and font settings.

You can play around with the different settings – you can use custom colors and fonts to your heart’s content – to achieve the look you want for your presentation.
Lastly, if you want to add a logo, company tagline, or website address to all slides, go to View > Slide Master. To insert elements you want to appear on all your slides, simply click on the Insert tab and insert the elements you want to appear globally.
7. Embed fonts in your presentation
Make sure your custom or branded fonts are in PowerPoint. If your fonts aren’t installed on the computer you use to run your presentation, PowerPoint will automatically replace your font with a default font and mess up your alignment and the overall look of your presentation.
Here’s how you do it:
- Go to File > Options > Save.
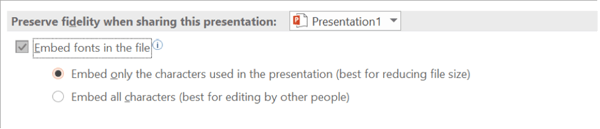
- Go to the section, ‘Preserve Fidelity when sharing this presentation’ then tick on the ‘Embed fonts in the file’ box.
- You’ll have two options here. You can either (1) embed only the characters used in the presentation, or (2) you can embed all characters if you want other people to edit the file too.
- Hit the OK button.
8. Create your own icons in PowerPoint
You can download free icons from sites like IconStore.co or even from 24Slide’s Template site (you’ll find icons in the ‘Other’ category).
If you have an Office 365 subscription, you can insert an icon straight from your PowerPoint ribbon. Go to Insert > Icons and browse hundreds, if not thousands, of free icons.
But when you want to use something unique — and you have the time and the creativity — you can do it on PowerPoint using Shapes.
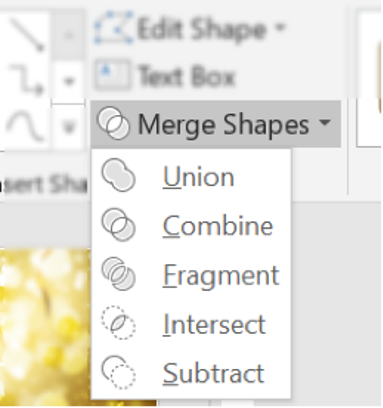
To begin, go to Insert > Shapes. If you have two or more shapes, click on them and the following options will appear in Drawing Tools > Merge Shapes: Union, Combine, Fragment, Intersect and Subtract.
Play around with the different options and let your creativity run wild. You’ll soon have a library of your own unique icons which you can then use in your presentations.
9. Work with multiple images on a single slide
Working with multiple images on one slide is tricky if you’re manually moving, reshaping, and resizing each image by hand. Luckily for you, PowerPoint has a powerful trick.
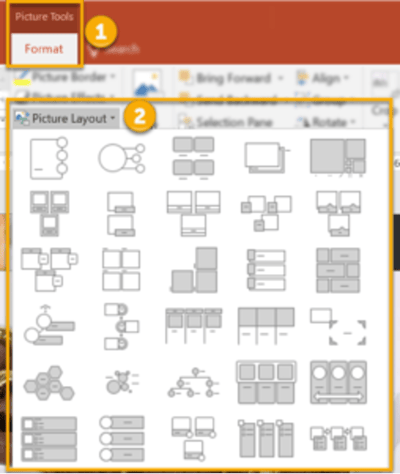
Hit CTRL+A on your keyboard to highlight all the images. Now you can access the hidden Picture Tools menu. Click on Format > Picture Layout and select the layout you want to use.
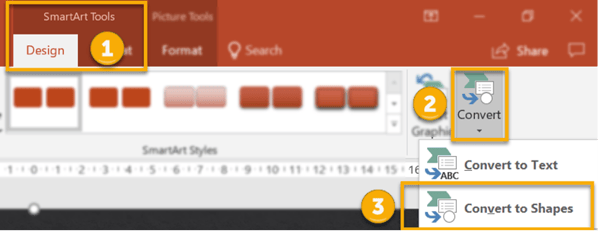
Once you’ve selected your layout, your images will be converted to a SmartArt graphic. Now you can rearrange your images. However, it will still behave like a SmartArt graphic.
To disable SmartArt properties, you need to re-convert the graphic back to Shapes. Simply click the graphic to access the SmartArt Tools menu, click on Design > Convert > Convert to Shapes.
POWERPOINT PDF Tricks
10. Save your PowerPoint presentation as a PDF
Sometimes you may want to preserve your PowerPoint format and layout and have it viewed as a PDF. You have two easy ways to do it:
- Option 1. Go to File > Save As. Choose the location where you want to save your file. In the Save as type drop-down, choose PDF.
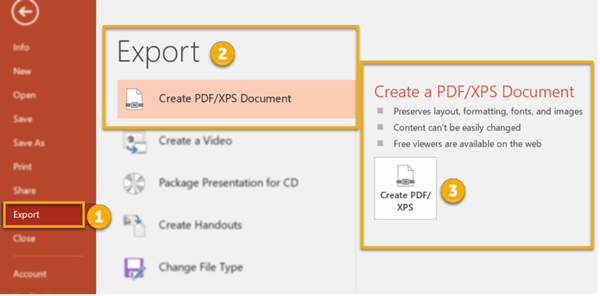
- Option 2. Go to File > Export > Create PDF/XPS Document.
Final Thoughts
There are hundreds of tricks you can do on PowerPoint. But the 10 PowerPoint tricks covered in this article will help you improve your presentation design skills. You can finally bid adieu to ‘death by PowerPoint’ and start wowing your audience with your awesome presentations.