Curve Dental

Overview
GoTo Connect and Curve Dental have come together to offer the best office software solution for dental practices. This integration enables you to seamlessly synchronize your practice’s phone system with Curve Hero, lowering office costs while also delivering personalized customer experiences to your patients.
· Win and retain patients with an integrated phone system - When a current patient calls into your practice, the GoTo Connect/Curve Dental integration will automatically populate your computer screen with that patient’s information, treatment records, and billing history before you even answer the phone.
· Control costs while enjoying update phone system features - Equipping your practice with a full-featured phone system can cost you thousands of dollars. With GoTo Connect, there’s little to no upfront capital costs, and 80+ advanced voice features come standard at no extra charge.
· Manage your call routing from the web without tech expertise - GoTo Connect’s phone system is simple to use, with a graphical online interface that’s easy to update with real-time changes. Manage your system from any computer, and make calls from any desktop or mobile device.
How To Install
Prerequisites: GoTo Connect phones (soft phone does not work), Account setup in GoTo Connect including phones, users and phone lines (You should have a Super User account created). Setup
This setup will need be completed by a user with admin access in Curve Hero.
1. Log into Curve Hero.
2. Click on the more menu (the three horizontal lines icon above the Sidekick.
3. From the drop down menu, click on 'Administration'.
4. On the left side of Administration, select 'User Management'.
5. Click on a user that will be using the VoIP Integration.
6. At the bottom of the user profile, GoTo Connect Settings will be listed.
View Image
7. The first setting is for the pop up phone call notification to appear on the screen for the logged-in user.
8. The second option is to authorize access to GoTo Connect for this user. This option will take you to GoTo Connect to configure this user for the GoTo Connect integration within Curve.
View Image
9. You will then be asked to authorize access for the user.
View Image
10. Refresh Curve to ensure that the integration will start to work for this user.
Image: View Image
This is what you'd see in the Sidekick: Image: View Image
Inbound Call Notifications
1. An inbound call will search Curve Hero to match the home, work or cell phone. The search looks at contacts, non-patient and patient, as well as users in administration. An inbound call will create a notification (as long as the notification is activated for a user). These will show a caller ID number, the patient picture (if available), the patient name, the Head of Household (HOH), the phone number the call is originating from, and patient status..
NOTE:If multiple family members share the same inbound number, the family name will display and then show the Head of House (HOH) information in the notification. If multiple Head of House (HOH) share the same number, the notification will show as an unknown caller as there is no certain way to indicate the correct caller.
image: View Image
2. The notification does not require action from the user or disrupt the current task. It is simply a notification. If you want to load the patient information for the caller, simply click on the blue link in the notification. The patient will load in the Sidekick and their Profile page will load. If the user is in the Scheduler when the link is clicked, the patient information will load in the Sidekick and the scheduler module will remain.
3. To answer the call, simply pick up the phone. Depending on how you have setup GoTo Connect for the devices, all lines may ring or only one line may ring.
Note - If the office has multiple phone lines, the user could see multiple notifications when more that one patient calls at the same time.
Click to Call
1. Select the patient that you wish to call from the Sidekick or Profile.
2. Click on the phone next to the number you wish to call
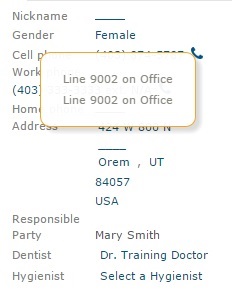
3. If you have more than one phone line, a menu will appear allowing you to choose the line to dial the call. Select the correct line to make the phone call.
image: View Image
4. The device (or phone) that you selected will ring. Pick up the phone and the number will be dialed to connect with your patient.
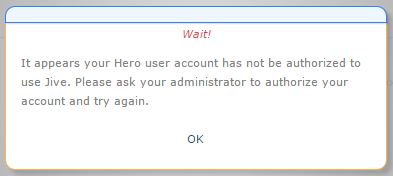
If a user that is not setup to use Voip clicks on the phone option the following message will appear: image: View Image
Hint - The phone will also appear in a gray color if the user is not setup for VoIP. To resolve this, simply follow the steps listed above for this user.
Disable User
You may wish to no longer have the VoIP integration available for a user.
1. Click on the more menu above the Sidekick.
2. From the drop down menu, click on 'Administration'.
3. On the left side of Administration, click on 'User Management'.
4. Click on a user that needs the VoIP Integration disabled.
5. At the bottom of the user profile, GoTo Connect settings will be listed.
6. Revoke access is listed. 'Click on Revoke Access'.
7. The user profile will now show the option to authorize access. This indicates that the user is no longer setup to use VoIP in Curve Hero.
8. Refresh Curve Hero to ensure that the integration is updated for this user to no longer receive VoIP phone calls.